Sunday, 11 April 2010

Front Wing Day

Todays the day the estate should look like a car again, I am intending to finally fit the front wings, but first there are a few small jobs to attend to :-

A small rust repair in the lip of the bulkhead where the wing fits - I'd left this as too small to bother with originally, but its got to be done.


Welding up the remaining hole in the Driver's A pillar


Then fabricating the bracket which the wing sits on infront of the screen

and now welded


Remove the flange from the passenger side inner wing, I had kept this as my original  secondhand wing was minus the flange, but my NOS one that I now have has the flange


There were a few other little jobs too, such as welding up and grinding off the drill holes where I had taken the wings off down the A pillars, anyway all done so I commenced to trial fit the wings


It wasn't bad but not perfect and required adjustment. However because of the bonnet damage that had already been caused, I couldn't be certain about parts of the fit, so I swapped the bonnet with the bulge, for the one I had kept from the green estate.

This was much better, and I soon got the passenger wing nicely aligned. The driver's side one had to come off a few times, firstly to alter its fit with the headlamp panel - I let metal in, as the wing was pushing the top panel down


Eventually it all fitted nicely, the wing gap is completely parallel on the passenger side, but tapers slightly on the Driver's side


The panels are only held on with pop rivets, so the next job is to plug weld them on.

The green bonnet fits well, and has no rust, unlike the white one, which has dents and rust, so I have decided to transplant the bulge, and make the other modifications to the green one.

So apart from the drag strut mount, the passenger rear window and a few little bits and pieces of tidying up welding thats the shell finished. At times I never thought I get here.

Hours worked 477 - 8 hours today

Saturday, 10 April 2010

Pig of a job

Lets start with parts updates.

Front struts, in the end I found 2 companies who could help, Gaz, can rebuild then, Leda can make new ones.

I have ordered 2 from Leda with 2 rear dampers, 29 point adjustable in bounce and rebound apparently. ( this will have a large impact on the costs todate too!)

Surface Treatments  - I have booked the shell in on the 7th July for dipping and e-coating, so I have to get a move on.

Todays job, was to get the rear hatch aligned with the lamp housings fitted, this took much fettling and adjustment. Firstly I simply cleaned off the lamp housings of unwanted metal and flanges and pushed them in place.

Left hand


Followed by the right hand, after removing the remains of the original one.


The tailgate is still offset to the right, so off it came, to elongate the mounting holes - I had to do this twice in the end.

As you can see the gap is now even


After refitting I had to manipulate the lamp housings, so that they were the same distance from the rear valence, the hatch channels were aligned, the inner flanges were parallel and level with parts of the rear wing, and finally the flange on the rear wing was aligned with the flange on the lamp - and not forgetting the bootlip closer met the same part on the housing. I achieved this with much aggravation by getting the distance from the valence correct first. I then tack welded in place at this point, and then basically used hammers, leavers and gentle persuasion to align the rest.

This is the end result


I was pretty pleased with this !

There is lead loading to be done, in quite a few places, but Surface Treatments have said that the dipping may remove the lead, so its best to wait until the rust has been removed.

I then finished welding everything in place, and even did the large seam where the valence joints the inner boot which had been left, about a 4ft seam weld.

After this result I had time to fit the side window channel driver side


Which I tack welded in place - this was brazed originally.

Then moving into the inner boot area I fitted the rest of the channels and strengtheners on the driver's side


I still have to weld the C posts to the outer wing where they join, but I want the shell back on the spit first and upside down so that the lead runs away from the weld, not into it under the influence of gravity. I will also then fit the passenger side window channel, which I cannot get to at the moment as it is against the garage wall.

Total hours worked now 469 - 9 today

Monday, 5 April 2010

More welding jobs

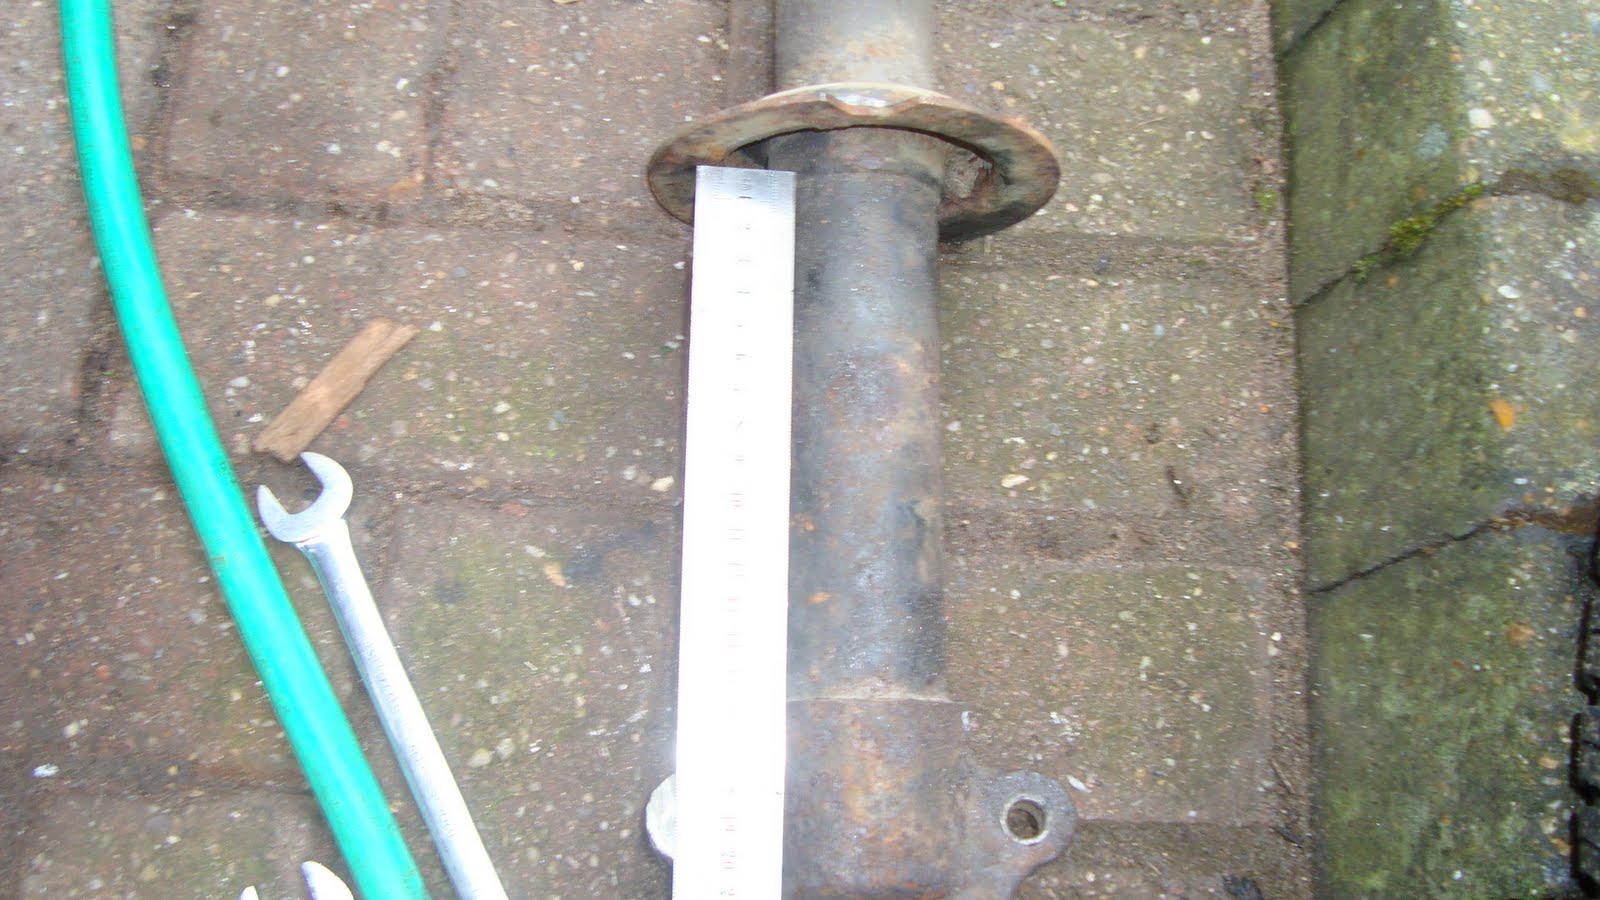
Before I started on the estate today, I had to change a rack gaiter on the Stag - it failed its MOT for this. While I did this I remembered to compare the struts with those on the estate.

The estate unit


If I was a better photographer you could read the measurement on the ruler, its 16cm from spring seat to the top of the cast mount, whereas the stag (and 2000) is 20cm


Any ideas anyone ?

Also I've a pair of new Koni inserts which I bought off ebay which are for sale now.

That job done, I proceeded to finish of the little bits of welding left underneath, boot floor plug welds driver's side.


Rear wheel arch plug welds driver's side


Driver's side sill, with repair panel at rear


Plug weld penetration visible confirming good welds


Rear Sill closing panel finished


So on to the rear hatch and light fittings. Took the rear of the spit off for now, and supported the car on 2 legs off the spit bumper mount.


Fitted the new rear tailgate, unfortunately on inspection its 3 mm or so too far to the right, and there is no adjustment


To fix this I am going to remove the tailgate, and elongate the mounting holes. The captive nuts in this will then allow the required movement. Once this fits well, I will "craft" the replacement lamp housings and panels to fit the tailgate. They were hand crafted by Carbodies in Coventry, and reputedly no two estates are exactly the same anyway.

The tailgate is offset by the same amount in the hatch housing as can be seen here


But otherwise its an acceptable fit, I will play further with this next week and hopefully get the lamp housings inserted too.

Hours worked now 460 - 8 hours today

Saturday, 3 April 2010

Front wheel arch finished - hoorah!!

Got up early and went to BOC Wolverhampton today, on the doorstep for 8.30 and got my gas, so on with the welding.

Mid section of wheel arch fitted


Then fabricated and fitted front section


Easy really, I don't know why I kept putting the job off. It was time consuming, most of the day, but its a good fit with the wing. It still needs the welds grinding off, but thats another upside down job.

The wing still fits too, so thats a bonus.


On to other jobs, firstly finished the windscreen pillar welds on the passenger side


And here's the join between the old and new frames, it needs a little lead loading, but its still a nice fit.


Did the plug welds in the passenger floorpan too


Next jobs, get the car upside down and grind off the welds in the wheel arch, finish the boot floor and inner wing spot welds at the rear on the drivers side.

After that I have a choice of 3 major jobs to finish, its either fit the 2 front wings or deal with the tailgate aperture, and rear lamp housings. Still I am really pleased there is an end in sight to the major body work repairs, and I haven't even been working on it for a year yet.

Small jobs to attend to are reskinning the doors and repairing the dents in the bonnet.

Finally the to do list is smaller than the finished list

Hours worked now 452 - 9 hours today.

Friday, 2 April 2010

Last rear wing fitted and other jobs.

A good days work today.

Finished the rear wheel arch welding repairs


And repaired the front of the arch, this needs completing in the sill area, but I will do that next time the car is inverted.


Then a small repair to the inner wing was needed just above the sill


Then on goes the wing, good fit with the door too


Nice fit on the rear valence too


Plug welds of wing to body at door aperture


I have plug welded the wheel arch too, it just needs the welds in the boot floor to complete, but I will do these later before I rotate the car to finish the rear sill closer.

While things were going well, I decided to revisit the front wheel arch on this side, the one I had abandoned work on twice. I made some good progress here and got the sill closing panel and part of the inner arch repair fitted. You can see the plug welds in the middle of this pannel, where it connects to the middle sill.


Next job is to finish this wheel arch. After that I have still a few bits to do around the base of the windscreen pillars. If this all goes well I may get the front wings on this weekend, and that will be the front of the car finished. Although, I need to hope that BOC are open this Easter Saturday, as I am nearly out of gas.

Hours worked 443 - 9 today.

Sunday, 28 March 2010

Slow Progress

Had another day welding on the estate today, interrupted at various and frequent times by my sons who needed attention to various bits and pieces on their moderns.

The welding was really just finishing bits and pieces off, so no dramatic progress, but the passenger side is now finished apart from the rear lamp area, rear hatch to wing, and fitting the front wing, and of course the front drag strut mount. If I say it quickly it doesn't sound much!

Plug welded the rear wheel arch which is now finished


Got inside the car to attend to the welds on the cant rail joints, before


And after, I have left the square hole as I want to reinspect the internal welds made through this hole to the far side of the cant rail, but I haven't got a good view at present due to the cage.


On the driverside I started to do the rear wheel arch repair sections, and finally gave up after one interrruption too many. The rear repairs are fitted but need the welding finishing


In reality the driverside is nearly at the same state as the passenger side, finish the wheel arch repairs, fit the rear wing, plus a few other bits and pieces of plug welds to complete and then that too will just need the wing fitting and the lamp sections.

Work permitting I think I can complete the shell in a few weeks - but not the doors or bonnet, so I am contemplating booking it in at surface treatments, the remaining parts can go down later. Before it goes, it needs a good inspection and snagging session, anyone who wants to inspect it and help point out areas that I have missed will be most welcome, as its hard to spot your own mistakes!

Hours now worked 435 - 7 today.

Saturday, 20 March 2010

Welding Again

First job of the day was to finish the bottom end of the engine, so I put the last 4 pistons in, oiled the unit and shrink wrapped it. That will keep the dust and dirt off, and moisture out until I am ready to do more work on it.


Back to the welding, first job was the unfinished bulkhead / floor pan on the passenger side, which looked like this


Repair panel made up and held with fasteners


and after seam welding, shaping, plug welding and grinding the finished result


I then did various bits of plug welding that have been left for a long time, floor pan


The remaining large holes need doing from inside the car as they are from or connect to the seat mount.

Then plug weld parts of the boot floor


And finally it was time to look at the drag strut mount. This had a small rust hole in the side, but this is what I found


Clearly shows what happens if you double skin metal and it gets wet. This unit is of altered construction to standard, as it is mounted below the chassis rails, and has been reinforced (presumably to cope with the additional stress of driven wheels), but the reinforcing consisted of extra plates welded on top of the original metal, the side plate can be seen here - complete with the original rust hole


When the side plate is removed you can see the welds where metal has been let into lower the mount


The other side of the strut also has a reinforcing plate, and again the original metal has some rust holes just visible here above the tube.


The question is how to repair it?

Obviously I can replicate exactly what was there before with 2 layers of metal, but its always got a potential rust problem, or can I use thicker metal say 3mm ? The problem with this will be distributing the loads.

The double box section at the rear of the strut can be dealt with by leaving a gap between the 2 flat skins of say 5mm so paint will get in and water can get out, but its the sides that are more of an issue. Time to put the thinking cap on! and ponder the problem. Still I have plenty of other jobs to do while I consider this!

Also I think I need to remove the top plate from the other strut mount and inspect. if there is hidden rust I might as well fix it now, the trouble is the other side seems sound with no trace of failure.

Hours worked now 428 - 8 today

Where am I?