I am just back from a weeks hard work in Edinburgh, so feeling a little tired today, but I must make progress.
Fitted an 072 type battery today, in the battery compartment, I couldn't secure the battery clamp though as the modified Stag battery box required a shorter fastening rod on the inner wing side, and as I was re cutting the thread for the wing nut, the blessed thing sheared off, just above the hook. The next one will have the thread left alone, and after shortening, will have the end hook reformed with the aid of a lot of heat from my acetylene torch. Good job that I hadn't secured the vacuum pipe, as I had to move this out of the way to slide the battery into place
Next, headlamps, I had purchase a set of Cibies from Chris Witor, these look like the originals, but use modern lamps and give a superb beam pattern that is bright and more in keeping with modern cars.
To save the contacts in the column mounted headlamp switch failing, and to ensure maximum voltage at the lamps, I made up a stainless steel bracket to hold 2 relays
then added various cables
using this basic wiring diagram, which I hope is of use to others.
This was fitted on the nearside radiator support bracket behind the headlamps, well out of the way of water and road debris. The end result is this, low beam
and high beam
That was it apart from a visit from David Wilson (Spitfire 1500 on the CT forum) who came along for a chat and to collect the overdrive gearbox that I had collected from Edinburgh for him.
Ted Taylor has also kindly donated the missing heater vent pipes that I need too.
Hours worked now 818 (5 today)
Money spent now £17615 (£310 on Cibies, battery and bulbs)
Saturday, 17 December 2011
Saturday, 10 December 2011
Heads and other bits and pieces
First job was to collect the NOS heads today and get them to Roy Burrell for attention, they came with new cams, followers and valves so some money saved on new buckets !
Sorry about the picture quality from my iphone.
The other jobs, cleaned and fitted the rear aluminium boot lip fitting, its not pristine, but I didn't want to polish it and loose the anodised finish. The broom is needed to prop the tailgate open!
Then on to the brake servo fittings, I replaced the vacuum pipes to the reservoir and generally finished off around the ABS valve. I haven't clipped the pipe in place yet, as I suspect fitment will need adjustment when the radiator and air intake are fitted. As I couldn't get the pipework re-plated , I cleaned it off, rust proofed it and then used some cadmium look alike paint for an authentic finish
Back to the wiring, I fixed the handbrake indicator fault, the wire was broken at the connector on the handbrake - nice and easy that one.
I then fitted the internal divider to the front nearside indicator and side lamp, hence rendering that MOT suitable.
The wiring to the rear tailgate was completed, and I now have a functioning number plate lamp and a rear screen heater. It was a right pig to get the wires down the rear D post.
The rest of the day was spent threading the interior light wires down the A and B posts to the door switches, so now the interior lamp comes on when the doors open. The disconnected wire powers the fuel pump - I don't want it "sucking on air".
Next job will be the head lamp relays, I am fitting some cibie's because of the night driving on the RBRR, its a shame not to fit the original Lucas units, but they are dimmer than a Toc H lamp!
Hours worked today 6, so the total is now 813, money spent on heads £1875 so a grand total of £17305
Sorry about the picture quality from my iphone.
The other jobs, cleaned and fitted the rear aluminium boot lip fitting, its not pristine, but I didn't want to polish it and loose the anodised finish. The broom is needed to prop the tailgate open!
Then on to the brake servo fittings, I replaced the vacuum pipes to the reservoir and generally finished off around the ABS valve. I haven't clipped the pipe in place yet, as I suspect fitment will need adjustment when the radiator and air intake are fitted. As I couldn't get the pipework re-plated , I cleaned it off, rust proofed it and then used some cadmium look alike paint for an authentic finish
Back to the wiring, I fixed the handbrake indicator fault, the wire was broken at the connector on the handbrake - nice and easy that one.
I then fitted the internal divider to the front nearside indicator and side lamp, hence rendering that MOT suitable.
The wiring to the rear tailgate was completed, and I now have a functioning number plate lamp and a rear screen heater. It was a right pig to get the wires down the rear D post.
The rest of the day was spent threading the interior light wires down the A and B posts to the door switches, so now the interior lamp comes on when the doors open. The disconnected wire powers the fuel pump - I don't want it "sucking on air".
Next job will be the head lamp relays, I am fitting some cibie's because of the night driving on the RBRR, its a shame not to fit the original Lucas units, but they are dimmer than a Toc H lamp!
Hours worked today 6, so the total is now 813, money spent on heads £1875 so a grand total of £17305
Monday, 5 December 2011
Electrickery and other bits
As I attend to the major remaining jobs, I am also trying to catch up on the little bits and pieces that also need completion, so I don't have a pile of small jobs left at the end to complete.
So first item attended to today were the hoses from the brake reservoirs to the master cylinder
Still needs a clip or cable tie to tidy up the lower hose, but its another item done.
Then onto the electrics.
First job was to connect a car battery to the main battery cables, but I did this with a 20amp fuse in line, its enough to power most electrical items, but will prevent a smoking loom in case of a major fault.
Started with the side lamps, first fault was an old bulb that had the solder connection on the rear compressed so much with time and age it was a poor contact. Then found that the nearside sidelamp / indicator was missing the lense divider internally (another item to source) so the sidelamp also illuminates the indicator and vice versa.
One of the NOS rearlamp holders had a mispressed bulb holder, so the offset pin stop and tail bulb won't fit, simply cured for now by filing one of the pins off the bulb.
On and on the job went, most faults caused by miss connecting green / brown to green purple circuits ! - hard to tell the 2 colours from each other, but by the close of the day most items were tested and working, but I still have to complete the side repeater indicators and the internal roof lights, with the starter connections yet to be tested, and a fault on the handbrake warning circuit. I also need to fit headlamp relays, and bolt the horns on.
Interestingly the car has the Stag type combined oil pressure warning lamp / brake PWDA fail indicator (all of which work).
Instruments were tested by grounding the wires at the sender position, and watching the needles move.
It was nice to see the instrument needles move after all this time, and wiper motors work etc etc, a good feeling of satisfaction as the car slowly comes to life after all these years
Believe it or not that was a whole day gone, 8 hours work so the total is now up to 807 hours
So first item attended to today were the hoses from the brake reservoirs to the master cylinder
Still needs a clip or cable tie to tidy up the lower hose, but its another item done.
Then onto the electrics.
First job was to connect a car battery to the main battery cables, but I did this with a 20amp fuse in line, its enough to power most electrical items, but will prevent a smoking loom in case of a major fault.
Started with the side lamps, first fault was an old bulb that had the solder connection on the rear compressed so much with time and age it was a poor contact. Then found that the nearside sidelamp / indicator was missing the lense divider internally (another item to source) so the sidelamp also illuminates the indicator and vice versa.
One of the NOS rearlamp holders had a mispressed bulb holder, so the offset pin stop and tail bulb won't fit, simply cured for now by filing one of the pins off the bulb.
On and on the job went, most faults caused by miss connecting green / brown to green purple circuits ! - hard to tell the 2 colours from each other, but by the close of the day most items were tested and working, but I still have to complete the side repeater indicators and the internal roof lights, with the starter connections yet to be tested, and a fault on the handbrake warning circuit. I also need to fit headlamp relays, and bolt the horns on.
Interestingly the car has the Stag type combined oil pressure warning lamp / brake PWDA fail indicator (all of which work).
Instruments were tested by grounding the wires at the sender position, and watching the needles move.
It was nice to see the instrument needles move after all this time, and wiper motors work etc etc, a good feeling of satisfaction as the car slowly comes to life after all these years
Believe it or not that was a whole day gone, 8 hours work so the total is now up to 807 hours
Friday, 2 December 2011
I am sure my estate is female !
Normally anything that you have spent time,and money upon and lavished with affection would be grateful, but not my FF estate, it can only be female! This week it decided to bite me upon the backside (again), and ultimately in the wallet.
The heads that I had had rebuilt with weld, and new guides, and even had pressure tested have been found to have so much corrosion in the exhaust ports (from being left full of water) that the valve inserts are in danger of falling out some day. Maybe not when the engine is first run, may be not in the first 5000 miles, but at some point, a seat will fall out causing valve, head and piston failure. So these are scrap.
What to do, buy another warped old set off ebay, go round the dealers and see if they have anything decent, buy a pair of SOCTFL re-made new heads at some £3600 and a long wait, no, I knew of a NOS set in the hands of a certain dealer, so I have struck a deal and purchased them - even I cannot bring myself to say how much they have cost, let me say however they are less money than the new SOCTFL ones, but more than a secondhand engine.
I suppose that I should be very grateful for Roy Burrell, his work and inspection of the heads saved a calamity and even more expense at some later date.
I really really hope that's the end of the nasty surprises.
On a brighter note I collected the footwell trim panels from Aldridge Trimming today
and delivered them an old complete and dis-coloured headlining from which they are going to make me a new one, so that's another job partially off the pending list.
I have resolved the brake pipe issues across the front bulkhead today, by finding some 3 pipe clips that fit and have similar dimensions to Triumphs 2 pipe fixing clips, a good reliable MOT approved fix
Finally a trip to Mick Dolphin sourced some other bits and pieces that I needed, including a right hand side grap strap - I already had the left handed ones.
The grubby white blocks - which will clean, (its the old mould release wax and years of dirt!) are the sunvisor retainers.
Finally I got the support rail fixed to the new driver's side shelf
So slowly and steadily the project moves forward
The heads that I had had rebuilt with weld, and new guides, and even had pressure tested have been found to have so much corrosion in the exhaust ports (from being left full of water) that the valve inserts are in danger of falling out some day. Maybe not when the engine is first run, may be not in the first 5000 miles, but at some point, a seat will fall out causing valve, head and piston failure. So these are scrap.
What to do, buy another warped old set off ebay, go round the dealers and see if they have anything decent, buy a pair of SOCTFL re-made new heads at some £3600 and a long wait, no, I knew of a NOS set in the hands of a certain dealer, so I have struck a deal and purchased them - even I cannot bring myself to say how much they have cost, let me say however they are less money than the new SOCTFL ones, but more than a secondhand engine.
I suppose that I should be very grateful for Roy Burrell, his work and inspection of the heads saved a calamity and even more expense at some later date.
I really really hope that's the end of the nasty surprises.
On a brighter note I collected the footwell trim panels from Aldridge Trimming today
and delivered them an old complete and dis-coloured headlining from which they are going to make me a new one, so that's another job partially off the pending list.
I have resolved the brake pipe issues across the front bulkhead today, by finding some 3 pipe clips that fit and have similar dimensions to Triumphs 2 pipe fixing clips, a good reliable MOT approved fix
Finally a trip to Mick Dolphin sourced some other bits and pieces that I needed, including a right hand side grap strap - I already had the left handed ones.
The grubby white blocks - which will clean, (its the old mould release wax and years of dirt!) are the sunvisor retainers.
Finally I got the support rail fixed to the new driver's side shelf
So slowly and steadily the project moves forward
Sunday, 27 November 2011
Two Steps Forward, and one Backwards
I knew that I had forgotten some jobs from the jobs list, so despite finishing some items, I have added another to the list, and done an extra two that I had not put on the list.
I was looking for the bumper brackets today to fit the bumpers, and while hunting about for the parts I found this
It fits on the inside of the panel where the fuel filler cap is, to stop the filler cap fixings damaging the body, so this had to go on. I wonder what else I will find that I have forgotten!
The front bumper fitted perfectly, its NOS, and although the chrome isn't perfect, its how the factory supplied them, so that's half the bumpers done. I had to clean out the threads on the mounting holes with a tap before the bolts would go in.
I then got out the rear sections and found to my horror that the driver's side quarter bumper, which looks like a 2000 one, isn't, as the mounting is in the wrong place, so no rear bumper fitted today, and I need to source a good 1/4 bumper - I have had a look on the internet and I know who has stock, so that's another hit on the wallet tomorrow.
Front brake pipes next, I refitted the serviced pwda valve that I had done many moons ago, changed the unions on the front pipes going to it (they are larger than the rear brake pipe unions to prevent funny cross connection by the unwary! - and finally made up and fitted the offside front brake pipe. I need to fabricate some clips for this, because instead of following the usual route across the front cross-member, this car has it following the 2 pipes from the servo, before it disappears down the inner wing on the driver's side.
While under the car I remembered that I had some improved drop links for the anti roll bar to fit, I was recommended to use them by a forum member who's identity I have forgotten, but they are a great deal better than the originals, so thank you who ever you are!
Old type
New ones
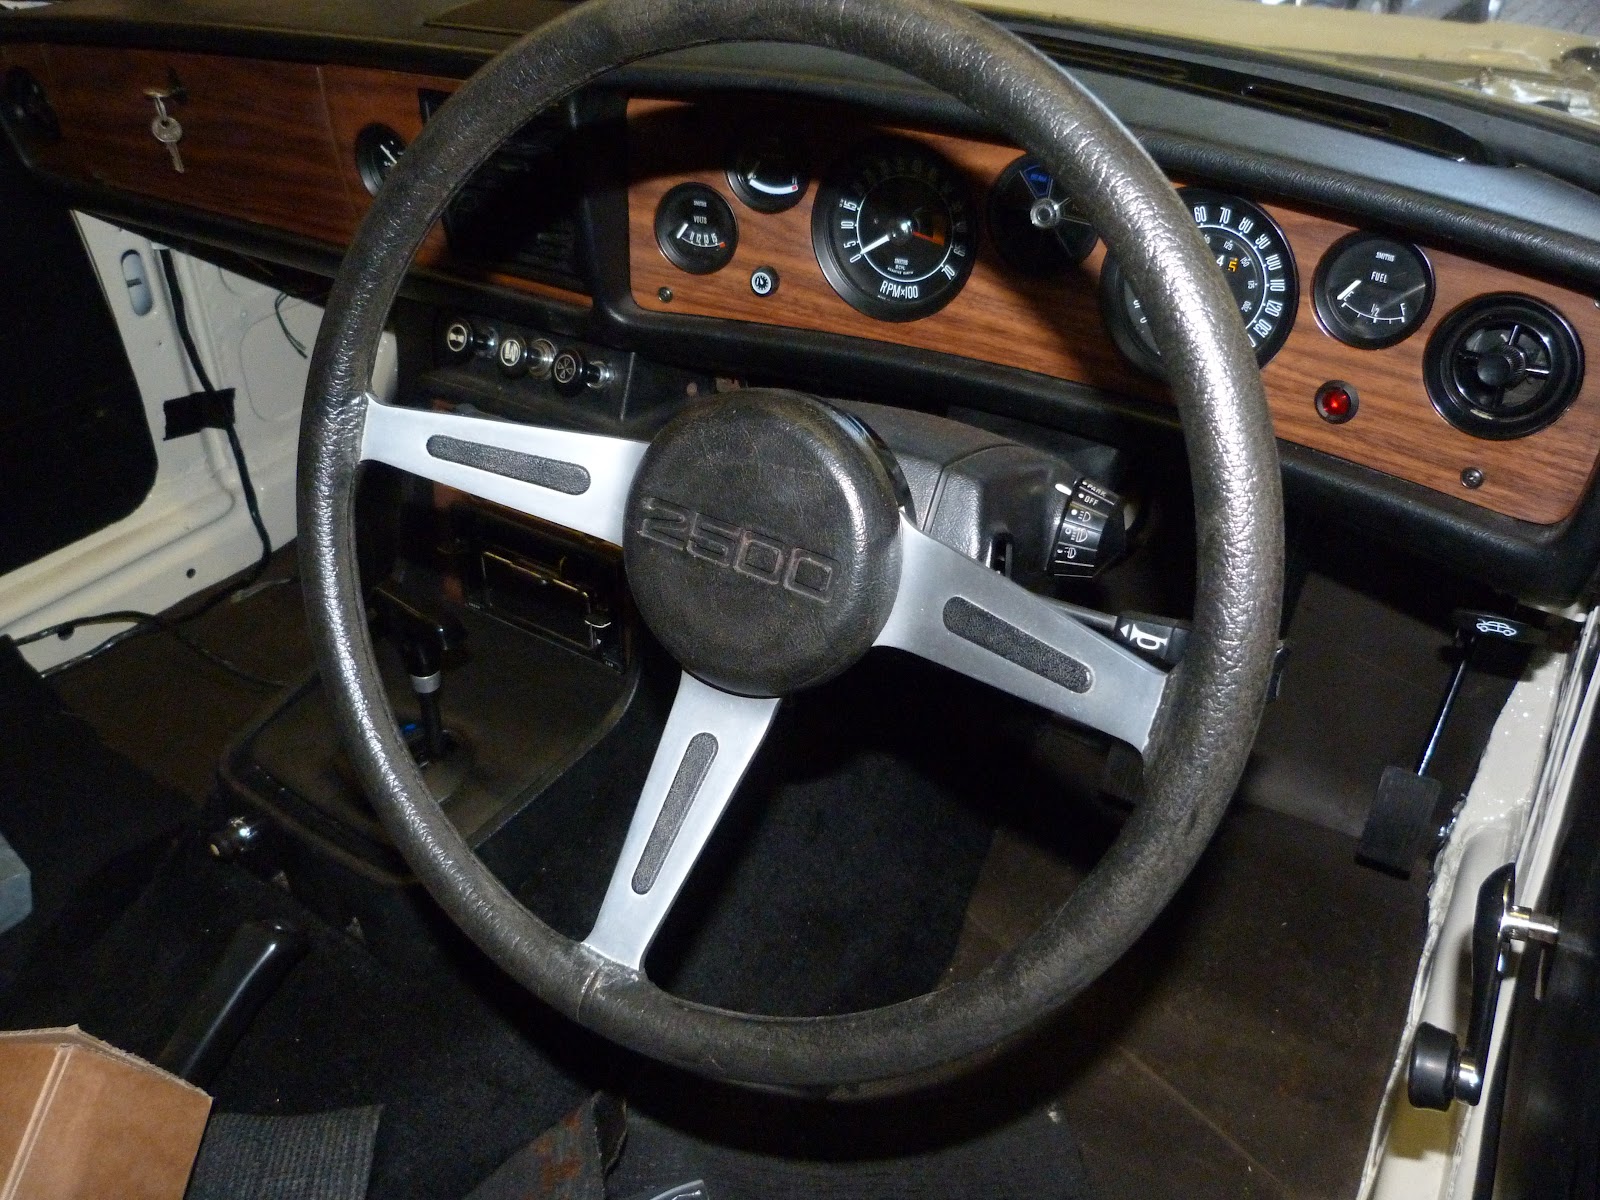
Fitted the NOS steering wheel as well
Finally I laid out the trim panels that I had finished yesterday in the load area - just to check the fit and not really just to admire how good they looked!
And that's it for today, 6 more hours bringing the total to 799
Next week its time to commission and check the electrics - must get some spare fuses !
I was looking for the bumper brackets today to fit the bumpers, and while hunting about for the parts I found this
It fits on the inside of the panel where the fuel filler cap is, to stop the filler cap fixings damaging the body, so this had to go on. I wonder what else I will find that I have forgotten!
The front bumper fitted perfectly, its NOS, and although the chrome isn't perfect, its how the factory supplied them, so that's half the bumpers done. I had to clean out the threads on the mounting holes with a tap before the bolts would go in.
I then got out the rear sections and found to my horror that the driver's side quarter bumper, which looks like a 2000 one, isn't, as the mounting is in the wrong place, so no rear bumper fitted today, and I need to source a good 1/4 bumper - I have had a look on the internet and I know who has stock, so that's another hit on the wallet tomorrow.
Front brake pipes next, I refitted the serviced pwda valve that I had done many moons ago, changed the unions on the front pipes going to it (they are larger than the rear brake pipe unions to prevent funny cross connection by the unwary! - and finally made up and fitted the offside front brake pipe. I need to fabricate some clips for this, because instead of following the usual route across the front cross-member, this car has it following the 2 pipes from the servo, before it disappears down the inner wing on the driver's side.
While under the car I remembered that I had some improved drop links for the anti roll bar to fit, I was recommended to use them by a forum member who's identity I have forgotten, but they are a great deal better than the originals, so thank you who ever you are!
Old type
New ones
Fitted the NOS steering wheel as well
Finally I laid out the trim panels that I had finished yesterday in the load area - just to check the fit and not really just to admire how good they looked!
And that's it for today, 6 more hours bringing the total to 799
Next week its time to commission and check the electrics - must get some spare fuses !
Saturday, 26 November 2011
Jobs to do, and some completed!
Right the project back on course, I have made some real progress this week.
Firstly I got the heads delivered to Roy Burrell, he has promised them back before Christmas, so I can complete the engine by mid January.
This is important as the car is now booked in at JP Exhausts in Macclesfield at the end of January for them to fabricate two extractor manifolds, and the entire exhaust system. I must say I was very pleasantly surprised at the cost, which I thought was most reasonable, not much more than the cost of 2 complete Stag systems from Rimmers with 2 of their extractor manifold kits. These will fit too, and are being built with V band joints, so no sleeves to split if I ever need to remove the exhaust, or its components for maintenance on other parts of the car. Can't wait to get this done, as I think its the last major milestone left, and I was worried about the potential bill.
I have also put the wheels in motion to get the DVLA to re issue the car's original Registration. I have now got my V765 form and all the documentation off to the club, with the appropriate fee, I just have to get Chris Allen round now to do the inspection, so if you are reading this Chris, please drop round some time.
As to work on the car, I couldn't quite face a cold garage today, so I decided to finish off the interior boot trim boards, by cleaning and fixing back the aluminium and rubber trim strips, with 4mm rivets and washers.
Here's the first one finished with the old one behind it.
and the rest
and finally all laid out how they will go in the car, I am chuffed to bits with these, looks a million dollars!
I'd have done more, but Alan Chatterton and family dropped in and we had a pleasant afternoon discussing Triumphs and the RBRR, anyway, its the cold garage for me tomorrow.
Hours worked today 6 total now 793 (seems ages since I tallied that up)
Costs to date, there's a few ebay purchases, the trim work and a few other bits and pieces to be added of £590, so the grand total is now £15430.
My jobs list to finish the car looks something like this (and I am certain to have forgotten a few things), so the target is to clear 4 or 5 items a weekend.
These jobs are in no particular order, with items that I have forgotten added to the list at the end.
Firstly I got the heads delivered to Roy Burrell, he has promised them back before Christmas, so I can complete the engine by mid January.
This is important as the car is now booked in at JP Exhausts in Macclesfield at the end of January for them to fabricate two extractor manifolds, and the entire exhaust system. I must say I was very pleasantly surprised at the cost, which I thought was most reasonable, not much more than the cost of 2 complete Stag systems from Rimmers with 2 of their extractor manifold kits. These will fit too, and are being built with V band joints, so no sleeves to split if I ever need to remove the exhaust, or its components for maintenance on other parts of the car. Can't wait to get this done, as I think its the last major milestone left, and I was worried about the potential bill.
I have also put the wheels in motion to get the DVLA to re issue the car's original Registration. I have now got my V765 form and all the documentation off to the club, with the appropriate fee, I just have to get Chris Allen round now to do the inspection, so if you are reading this Chris, please drop round some time.
As to work on the car, I couldn't quite face a cold garage today, so I decided to finish off the interior boot trim boards, by cleaning and fixing back the aluminium and rubber trim strips, with 4mm rivets and washers.
Here's the first one finished with the old one behind it.
and the rest
and finally all laid out how they will go in the car, I am chuffed to bits with these, looks a million dollars!
I'd have done more, but Alan Chatterton and family dropped in and we had a pleasant afternoon discussing Triumphs and the RBRR, anyway, its the cold garage for me tomorrow.
Hours worked today 6 total now 793 (seems ages since I tallied that up)
Costs to date, there's a few ebay purchases, the trim work and a few other bits and pieces to be added of £590, so the grand total is now £15430.
My jobs list to finish the car looks something like this (and I am certain to have forgotten a few things), so the target is to clear 4 or 5 items a weekend.
These jobs are in no particular order, with items that I have forgotten added to the list at the end.
1). Fit offside front brake pipe and fabricate brackets for
same
2). Change union on nearside front brake pipe at PWDA valve
3). Bleed brakes
4). Fill gearbox and transfer box with ATF
5). Fit gearbox to engine stiffeners
6). Adjust handbrake
7). Test all electrics – including fitting wires to auto
inhibit switch and relays for headlamps
8). Replace rear tailgate hinge tortion bars
9). Fit remainder of exterior brightwork (rear window
surrounds)
10) Fit new Ted Taylor windscreen
11). Fit dash parcel shelves
12). Fit interior trim to B and C pillars
13). Fit seat belts
14). Fit side carpet panels to front cockpit
15). Fit ABS electronics module
16) Fit front and rear bumpers
Now done-17) Fit trim strips and fittings to rear load area panels-Now Done
18) Fit carpets
19) Fit headlining
20), Fit remaining interior trim, side panels and wood to
rear of estate
21) Fit seats
22). Complete heads after machining as follows, fit Valves
and springs, cam buckets and camshafts, gap tappets with shims
23). Fit heads and timing chains, front cover, and pulley
24). Fit water pump
25). Fit inlet manifold and carbs, with fuel pipes,
breathers and accelerator cable
26). Fit Dizzy, plug leads and coil
27) Fit radiator and cooling fan and remaining hoses
28) Fit alternator and PAS pump with belts etc
29) Make up PAS to pump pipes (won’t take standard Stag
ones!)
30). Insert petrol and see if it starts
31). Test gearbox and check kick down
32). Fix run out on front disks – suspect its a hub /
bearing issue
33) Fit trim strip to rear window seal
34) Fit window winders and internal door handles
35) Fit ashtrays!
36). Fit NOS steering wheel
37). Fabricate and fit exhaust system inc custom tubular
manifolds
38). Fit windscreen wipers and new blades
39). Rust proof box sections with Dinotrol
40). Replace a few vacuum hoses on servo and connect to
inlet manifold
41). Complete bonnet lead loading and paint somehow and fit
42). MOT
part done-43). Get old registration back-part done
44). Cure slow airleak in 2 tyres
45). Run and test!
46). Fit trim to rear seats
Not much left to do then!
Monday, 21 November 2011
No time to Loose
Now I am committed for the RBRR with the car there's no time to loose, I don't want to be finishing it in the Plough car park!
I have dug the cylinder heads and inlet manifold out.
I found some unusual rust in the core plug under the manifold - glad I spotted this - I'd have been blaming the water pump, or the inlet manifold gaskets in due course. The hole is shown by the self tapper in the following picture.
The heads have already had the valves and guides replaced, and the seats recut. However when these were inspected the castings were porous in some areas, so I had them welded. They pass pressure testing OK now, but as you can see some of the combustion chambers are a funny shape round the edge where weld has been let in. This needs shaping, and the sharp chamber edges smoothing off (to prevent detonation - pinking).
Its a lot of work and expense, but worth it as the heads are low mileage and haven't warped, and haven't been excessively skimmed.
I am going to cheat a little as these are being delivered to Roy Burrell tomorrow so he can work his magic upon them, I may get them ported a little at the same time too. This engine is going to need all its horse power to overcome 4wd losses
So that's one set of jobs underway, when they come back and I get them bolted on I will try and fire up the engine for the first time in many many years
I have dug the cylinder heads and inlet manifold out.
I found some unusual rust in the core plug under the manifold - glad I spotted this - I'd have been blaming the water pump, or the inlet manifold gaskets in due course. The hole is shown by the self tapper in the following picture.
The heads have already had the valves and guides replaced, and the seats recut. However when these were inspected the castings were porous in some areas, so I had them welded. They pass pressure testing OK now, but as you can see some of the combustion chambers are a funny shape round the edge where weld has been let in. This needs shaping, and the sharp chamber edges smoothing off (to prevent detonation - pinking).
Its a lot of work and expense, but worth it as the heads are low mileage and haven't warped, and haven't been excessively skimmed.
I am going to cheat a little as these are being delivered to Roy Burrell tomorrow so he can work his magic upon them, I may get them ported a little at the same time too. This engine is going to need all its horse power to overcome 4wd losses
So that's one set of jobs underway, when they come back and I get them bolted on I will try and fire up the engine for the first time in many many years
Subscribe to:
Posts (Atom)