Tuesday, 27 October 2009

Very Pleasant Surprise

I didn't work on the car on Sunday, because I have been off work with Man Flu, and not feeling very well.
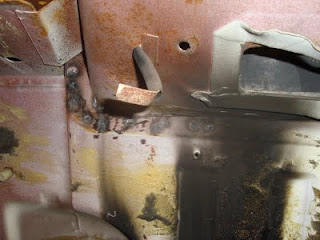
Completely bored, sick of TV and books, but felt a little better this afternoon, not good enough for bodywork, but I fancied a little play with the engine. I was really unsure what I would find, but anyway, inlet and exhaust manifolds off - "I know I will try and remove the head studs." They all came straight out, none seized, none stuck, and in really good condition as the picture shows.


Considering the rest of the car it was unbelievable, one head straight off - no struggle


And the cam, lobes and followers in really nice condition - some small evidence of chain stretch, but certainly backs up the speedo at 36000 miles only.


The bores are interesting, is still seized but the chemicals I have been using have worked, most rust gone from the bores.


Here's the other head this came off easily too


A nice mess of various chemicals in the bores. If there is nothing too nasty found under the grunge (and most seems ok) I think I will get by with new rings and a hone - what a pleasant result

3 hours work

Saturday, 24 October 2009

With very grateful thanks to Dave Harvey

Today's blog is dedicated in thanks to Dave Harvey who has kindly provided his only NOS nearside front wing for this project. I know how rare these are, and I really appreciate the decision to make it available for this job. Thank you Dave.

Thanks are also due to Allan Chatterton for donating the rear trim panel for the tailgate, and to Lee Godfrey for his support.

Back to the work. Chassis rail was a bit frilly on the flange, especially where the front outrigger has rusted away, and there is a hole right through the side where the outrigger was fitted


So I put a replacement piece of metal in place, this was "stretched" on the non  flange edge to let it follow the upwards curve of the chassis rail.


and front out rigger now temporarly in place.


Above the other flange there's a nasty hole in the transmission tunnel, where it has been heated and hammered into a new shape to clear the 4wd tranmission


Repair part made up, which will be weld into place tomorrow - I may have to repair the flange on the chassis rail on this side too, but I cannot investigate that until the tunnel flange is cut away.


Floor pan now fits nicely, but I won't fit this, or the outrigger until the sill repairs are done


So if time allows I will be cutting the sills off this side tomorrow.


Now the running totals of hours and cost.

Hours spent now 310 - 6 hours today.

Costs now £5923 - £50 spent on powder coating.

Thursday, 22 October 2009

Nice and Shiney

Went to the powder coaters today (LapTab in Birmingham) and collected some more bits and pieces that I had dropped off.

Now there should be some parts here that even the most ardent 2000 enthusiast won't recognise!


Bottom right we have 2 brackets fabricated by FFD which are the front diff to engine mounts.

Top right are the 2 engine mounting brackets made by Triumph which locate to the welded brackets in the engine bay.

Interestingly these now have a visible part number stamped on the reverse, drivers side B23368, passenger side B23369.

This little lot cost £50 which I will add to the running total later.

Sunday, 18 October 2009

Second Time Lucky

Less progress on the estate this weekend as I spent Saturday watching the Historic Sports Cars Racing at Silverstone, where a good time was had by all.

Back to the car, made the duplicate repair panel for the lower A post and fitted that, and then made up the "guttter rail" which had rotted through, shown here from the front, - with the lower A post repair.


and from behind and around the top of the drivers door


and now I can test fit the outer panel removed from the windscreen pillar. I may not use this one, as there is rot in it, I will need to inspect the pillar on the replacement roof to see if it is in better condition. Still the fit is good. I have made the gutter channel wider than needed, so it can be cut back to fit after the roof transplant. The roof transplant is fairly close now, a few small gutter repairs to finish, then I will clean off the flanges on this car and remove the last parts of the old roof, and after cutting the new roof off the old cant rails attempt to fit it.


Next job, drivers side floor pan, as you can see not much left of the front out rigger.


Still some bits left to cut out, but thats for next time.

Now the running totals of hours and cost.

Hours spent now 304 - 5 hours today, 6 last weekend.

Costs now £5873 - spare sill parts sold.

Sunday, 11 October 2009

How do you know when its time to stop?

The original title for this post was going to be "How rusty is your A pillar?", but I will explain later.

After a few days leaping in and out of the engine bay I decided to undertake a job that I could entirely do from outside the car, so driverside A Pillar it was.

Here it is, looks OK from the front, but underneath its horrible.


So drilled out the spot welds round the window frame and off the top panel comes - there was nothing holding it on at the back anyway.


As you can see the inner part of the A post doesn't look too healthy either - and it has a few holes right through it too, so I removed this and at last good metal.


So I made a repair section and fitted that, seam welded down the door edge and spot welded to the windscreen frame flange.


There now remained the lower part to attend to as there were a couple of small holes visible, so I removed the corner, and got back to good metal - although the top looks a little scabby, the metal is good and thick, I suspect the marks are mainly where rusty water has dried out on it.


I made a repair panel for this, flanges, compound curve correct - perfect and then dropped it as I was about to weld it in place. Not only did I drop it, it fell inside the A post, and I think all the way to the bottom, there's no recovering it, short of cutting an unneccessary hole in the A post. Whats worse is, this will rattle on every bump, so I must remember to inject a nice load of waxoil down this pillar after completion to prevent the rattle. So that's why it was time to stop, I just couldn't face making a new part again today.

Saturday, 10 October 2009

Fix One Hole and Find Another

Today has been spent filling and repairing holes in the bulkhead.

Mundane and not very satisfying work, takes a great deal of time and not much to show for it.

First job was to patch the original servo and clutch cylinder holes and mounts. With the modified ABS servo fitted, these holes were left open to the engine bay, and must have allowed noise and fumes into the car.

So plates fitted and mounting bolt holes filled. To fill the bolt holes, I did not let in plates, but held a copper plate to the rear of the hole and simply filled with weld - the weld does not stick to the copper, so it makes small holes easy to fill, although there is a fair bit of weld to grind back after.


And from inside the car


Rusty hole in the plenum


I cut an area out approx 3cm by 2 cm and let in a plate


More rusty holes in the plenum, because the rust was extensive, I cut the metal away and fitted an L shaped plate into the metal


Finished here


And a view from inside the car showing the penetration marks from the spot welds in the edges of the plate - this is always a good sign and confirms that the spot welds created by welding through a small hole in the plate on the other side have taken and actually formed a weld into the metal behind.


Finally the last hole, not as bad as the one on the driver's side of the transmission tunnel.


And repaired here


Thats it, (I hope) bulkhead repaired and no more holes currently visible in the engine bay that shouldn't be there.

Apart from this blog, I have been keeping a record of the hours worked on the car (not counting parts finding expeditions) and I am now up to a grand total of 293 hours. I wish someone was paying for this at £40 per hour or so!


Tuesday, 6 October 2009

Rust, is there no end to the rust?

Its not the rust that I know about, its the new rust in strange areas that I find, that I object to. Why has it rotted by the top of the tunnel??

Remove the front bulkhead pad, and there's 2 more holes, either side of the gearbox tunnel in the bulkhead, and both extending into the tunnel. The other side is the same. Its a 3 panel patch to repair nicely too


So not quick, a plate in the tunnel, and 2 on the bulhead, a (w)hole afternoons work, still first one finished and looks like this


The truth is I am putting off the wheel arch repair, I cannot get the repair panels to fit nicely, so rather than bodge it, I go and do other jobs on the car, its not as if I am short of them!

Got a new propshaft made for it today too MAC Propshafts in Coventry, and Polybushes from Canley Classics, so by the time the body is finished I should have everything ready to go back on the car.

Took a load more items off for powder costing too.

I am having another attempt at getting the engine to turn. I have been using Hammerite rust dip on parts for the 5, and unlike other rust removers, it leaves clean bare metal, not a converted solid rust barrier, so a load of this has been poured down the bores. I intend to leave it a week, then reapply to each bank with the engine canted over, so that it also fills the combustion chambers as 2 pistons are near tdc, and being a V8 I suspect I am not getting the solution to the area of the piston at the top of the bore in the area of the V - I will report on the outcome.

Saturday, 3 October 2009

Radiator Support and other bits

I didn't get as much done on the estate today as planned, 2 reasons:-

1). a hangover
2). a puncture necessitating a tyre repair and visit to the local KwikFit.

Anyway, these arrived in the week, new radiator (discount offer from Rimmers) and the radiator support panel from a Stag, that had been on back order for months.

So fitted the Stag radiator via its top mounts - its a bit of a squeeze in a 2500 engine bay, and bolted a cut down radiator support panel to its lower threaded support mounts

Tacked the panel in place

Fabricated some end supports from the chassis rails to the support panel, and here it is all finished

Radiator put back for a test fit of the completed support, as you can see here only a few mm between it and the Stag battery box.

By this stage I didn't feel up to the complexities of repairing the inner wheel arch lip, so I contented myself in filling the large hole cut in the inner wing for the antenna

So I guess it will be back to the inner wheel arch tomorrow

Where am I?