Saturday 17 December 2011

Headlamps and battery

I am just back from a weeks hard work in Edinburgh, so feeling a little tired today, but I must make progress.

Fitted an 072 type battery today, in the battery compartment, I couldn't secure the battery clamp though as the modified Stag battery box required a shorter fastening rod on the inner wing side, and as I was re cutting the thread for the wing nut, the blessed thing sheared off, just above the hook. The next one will have the thread left alone, and after shortening, will have the end hook reformed with the aid of a lot of heat from my acetylene torch. Good job that I hadn't secured the vacuum pipe, as I had to move this out of the way to slide the battery into place


Next, headlamps, I had purchase a set of Cibies from Chris Witor, these look like the originals, but use modern lamps and give a superb beam pattern that is bright and more in keeping with modern cars.

To save the contacts in the column mounted headlamp switch failing, and to ensure maximum voltage at the lamps, I made up a stainless steel bracket to hold 2 relays


then added various cables


using this basic wiring diagram, which I hope is of use to others.


This was fitted on the nearside radiator support bracket behind the headlamps, well out of the way of water and road debris. The end result is this, low beam


and high beam


That was it apart from a visit from David Wilson (Spitfire 1500 on the CT forum) who came along for a chat and to collect the overdrive gearbox that I had collected from Edinburgh for him.

Ted Taylor has also kindly donated the missing heater vent pipes that I need too.

Hours worked now 818 (5 today)

Money spent now £17615 (£310 on Cibies, battery and bulbs)

Saturday 10 December 2011

Heads and other bits and pieces

First job was to collect the NOS heads today and get them to Roy Burrell for attention, they came with new cams, followers and valves so some money saved on new buckets !

Sorry about the picture quality from my iphone.


The other jobs, cleaned and fitted the rear aluminium boot lip fitting, its not pristine, but I didn't want to polish it and loose the anodised finish. The broom is needed to prop the tailgate open!


Then on to the brake servo fittings, I replaced the vacuum pipes to the reservoir and generally finished off around the ABS valve. I haven't clipped the pipe in place yet, as I suspect fitment will need adjustment when the radiator and air intake are fitted. As I couldn't get the pipework re-plated , I cleaned it off, rust proofed it and then used some cadmium look alike paint for an authentic finish


Back to the wiring, I fixed the handbrake indicator fault, the wire was broken at the connector on the handbrake - nice and easy that one.

I then fitted the internal divider to the front nearside indicator and side lamp, hence rendering that MOT suitable.


The wiring to the rear tailgate was completed, and I now have a functioning number plate lamp and a rear screen heater. It was a right pig to get the wires down the rear D post.


The rest of the day was spent threading the interior light wires down the A and B posts to the door switches, so now the interior lamp comes on when the doors open. The disconnected wire powers the fuel pump - I don't want it "sucking on air".

Next job will be the head lamp relays, I am fitting some cibie's because of the night driving on the RBRR, its a shame not to fit the original Lucas units, but they are dimmer than a Toc H lamp!

Hours worked today 6, so the total is now 813, money spent on heads £1875 so a grand total of £17305

Monday 5 December 2011

Electrickery and other bits

As I attend to the major remaining jobs, I am also trying to catch up on the little bits and pieces that also need completion, so I don't have a pile of small jobs left at the end to complete.

So first item attended to today were the hoses from the brake reservoirs to the master cylinder


Still needs a clip or cable tie to tidy up the lower hose, but its another item done.

Then onto the electrics.

First job was to connect a car battery to the main battery cables, but I did this with a 20amp fuse in line, its enough to power most electrical items, but will prevent a smoking loom in case of a major fault.

Started with the side lamps, first fault was an old bulb that had the solder connection on the rear compressed so much with time and age it was a poor contact. Then found that the nearside sidelamp / indicator was missing the lense divider internally (another item to source) so the sidelamp also illuminates the indicator and vice versa.

One of the NOS rearlamp holders had a mispressed bulb holder, so the offset pin stop and tail bulb won't fit, simply cured for now by filing one of the pins off the bulb.

On and on the job went, most faults caused by miss connecting green / brown to green purple circuits ! - hard to tell the 2 colours from each other, but by the close of the day most items were tested and working, but I still have to complete the side repeater indicators and the internal roof lights, with the starter connections yet to be tested, and a fault on the handbrake warning circuit. I also need to fit headlamp relays, and bolt the horns on.

Interestingly the car has the Stag type combined oil pressure warning lamp / brake PWDA fail indicator (all of which work).

Instruments were tested by grounding the wires at the sender position, and watching the needles move.

It was nice to see the instrument needles move after all this time, and wiper motors work etc etc, a good feeling of satisfaction as the car slowly comes to life after all these years


Believe it or not that was a whole day gone, 8 hours work so the total is now up to 807 hours

Friday 2 December 2011

I am sure my estate is female !

Normally anything that you have spent time,and money upon and lavished with affection would be grateful, but not my FF estate, it can only be female! This week it decided to bite me upon the backside (again), and ultimately in the wallet.

The heads that I had had rebuilt with weld, and new guides, and even had pressure tested have been found to have so much corrosion in the exhaust ports (from being left full of water) that the valve inserts are in danger of falling out some day. Maybe not when the engine is first run, may be not in the first 5000 miles, but at some point, a seat will fall out causing valve, head and piston failure. So these are scrap.

What to do, buy another warped old set off ebay, go round the dealers and see if they have anything decent, buy a pair of SOCTFL re-made new heads at some £3600 and a long wait, no, I knew of a NOS set in the hands of a certain dealer, so I have struck a deal and purchased them - even I cannot bring myself to say how much they have cost, let me say however they are less money than the new SOCTFL ones, but more than a secondhand engine.

I suppose that I should be very grateful for Roy Burrell, his work and inspection of the heads saved a calamity and even more expense at some later date.

I really really hope that's the end of the nasty surprises.

On a brighter note I collected the footwell trim panels from Aldridge Trimming today


and delivered them an old complete and dis-coloured headlining from which they are going to make me a new one, so that's another job partially off the pending list.

I have resolved the brake pipe issues across the front bulkhead today, by finding some 3 pipe clips that fit and have similar dimensions to Triumphs 2 pipe fixing clips, a good reliable MOT approved fix


Finally a trip to Mick Dolphin sourced some other bits and pieces that I needed, including a right hand side grap strap - I already had the left handed ones.


The grubby white blocks - which will clean, (its the old mould release wax and years of dirt!) are the sunvisor retainers.

Finally I got the support rail fixed to the new driver's side shelf


So slowly and steadily the project moves forward

Sunday 27 November 2011

Two Steps Forward, and one Backwards

I knew that I had forgotten some jobs from the jobs list, so despite finishing some items, I have added another to the list, and done an extra two that I had not put on the list.

I was looking for the bumper brackets today to fit the bumpers, and while hunting about for the parts I found this

It fits on the inside of the panel where the fuel filler cap is, to stop the filler cap fixings damaging the body, so this had to go on. I wonder what else I will find that I have forgotten!

The front bumper fitted perfectly, its NOS, and although the chrome isn't perfect, its how the factory supplied them, so that's half the bumpers done. I had to clean out the threads on the mounting holes with a tap before the bolts would go in.


I then got out the rear sections and found to my horror that the driver's side quarter bumper, which looks like a 2000 one, isn't, as the mounting is in the wrong place, so no rear bumper fitted today, and I need to source a good 1/4 bumper - I have had a look on the internet and I know who has stock, so that's another hit on the wallet tomorrow.

Front brake pipes next, I refitted the serviced pwda valve that I had done many moons ago, changed the unions on the front pipes going to it (they are larger than the rear brake pipe unions to prevent funny cross connection by the unwary! - and finally made up and fitted the offside front brake pipe. I need to fabricate some clips for this, because instead of following the usual route across the front cross-member, this car has it following the 2 pipes from the servo, before it disappears down the inner wing on the driver's side.


While under the car I remembered that I had some improved drop links for the anti roll bar to fit, I was recommended to use them by a forum member who's identity I have forgotten, but they are a great deal better than the originals, so thank you who ever you are!

Old type


New ones

Fitted the NOS steering wheel as well


Finally I laid out the trim panels that I had finished yesterday in the load area - just to check the fit and not really just to admire how good they looked!


And that's it for today, 6 more hours bringing the total to 799

Next week its time to commission and check the electrics - must get some spare fuses !


Saturday 26 November 2011

Jobs to do, and some completed!

Right the project back on course, I have made some real progress this week.

Firstly I got the heads delivered to Roy Burrell, he has promised them back before Christmas, so I can complete the engine by mid January.

This is important as the car is now booked in at JP Exhausts in Macclesfield at the end of January for them to fabricate two extractor manifolds, and the entire exhaust system. I must say I was very pleasantly surprised at the cost, which I thought was most reasonable, not much more than the cost of 2 complete Stag systems from Rimmers with 2 of their extractor manifold kits. These will fit too, and are being built with V band joints, so no sleeves to split if I ever need to remove the exhaust, or its components for maintenance on other parts of the car. Can't wait to get this done, as I think its the last major milestone left, and I was worried about the potential bill.

I have also put the wheels in motion to get the DVLA to re issue the car's original Registration. I have now got my V765 form and all the documentation off to the club, with the appropriate fee, I just have to get Chris Allen round now to do the inspection, so if you are reading this Chris, please drop round some time.

As to work on the car, I couldn't quite face a cold garage today, so I decided to finish off the interior boot trim boards, by cleaning and fixing back the aluminium and rubber trim strips, with 4mm rivets and washers.

Here's the first one finished with the old one behind it.

and the rest


and finally all laid out how they will go in the car, I am chuffed to bits with these, looks a million dollars!


I'd have done more, but Alan Chatterton and family dropped in and we had a pleasant afternoon discussing Triumphs and the RBRR, anyway, its the cold garage for me tomorrow.

Hours worked today 6 total now 793 (seems ages since I tallied that up)

Costs to date, there's a few ebay purchases, the trim work and a few other bits and pieces to be added of £590, so the grand total is now £15430.


My jobs list to finish the car looks something like this (and I am certain to have forgotten a few things), so the target is to clear 4 or 5 items a weekend. 


These jobs are in no particular order, with items that I have forgotten added to the list at the end.


1). Fit offside front brake pipe and fabricate brackets for same
2). Change union on nearside front brake pipe at PWDA valve
3). Bleed brakes
4). Fill gearbox and transfer box with ATF
5). Fit gearbox to engine stiffeners
6). Adjust handbrake
7). Test all electrics – including fitting wires to auto inhibit switch and relays for headlamps
8). Replace rear tailgate hinge tortion bars
9). Fit remainder of exterior brightwork (rear window surrounds)
10) Fit new Ted Taylor windscreen
11). Fit dash parcel shelves
12). Fit interior trim to B and C pillars
13). Fit seat belts
14). Fit side carpet panels to front cockpit
15). Fit ABS electronics module
16) Fit front and rear bumpers
Now done-17) Fit trim strips and fittings to rear load area panels-Now Done
18) Fit carpets
19) Fit headlining
20), Fit remaining interior trim, side panels and wood to rear of estate
21) Fit seats
22). Complete heads after machining as follows, fit Valves and springs, cam buckets and camshafts, gap tappets with shims
23). Fit heads and timing chains, front cover, and pulley
24). Fit water pump
25). Fit inlet manifold and carbs, with fuel pipes, breathers and accelerator cable
26). Fit Dizzy, plug leads and coil
27) Fit radiator and cooling fan and remaining hoses
28) Fit alternator and PAS pump with belts etc
29) Make up PAS to pump pipes (won’t take standard Stag ones!)
30). Insert petrol and see if it starts
31). Test gearbox and check kick down
32). Fix run out on front disks – suspect its a hub / bearing issue
33) Fit trim strip to rear window seal
34) Fit window winders and internal door handles
35) Fit ashtrays!
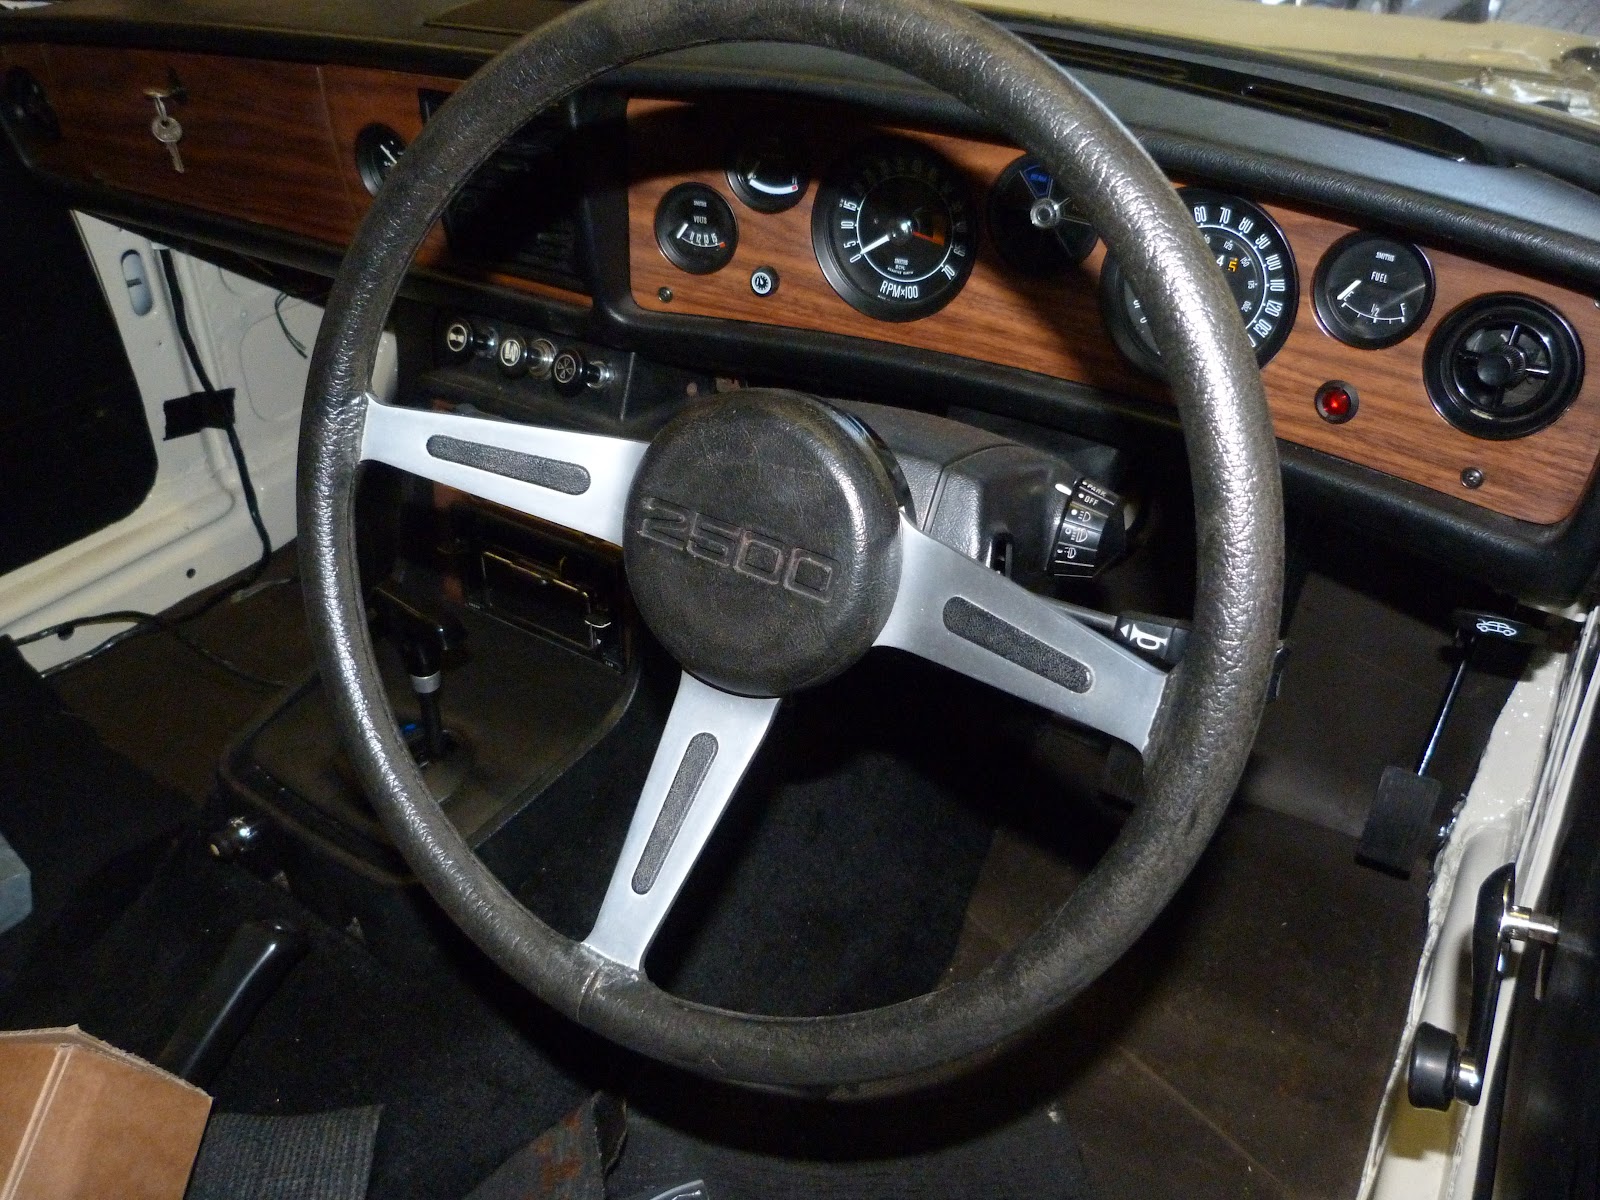
36). Fit NOS steering wheel
37). Fabricate and fit exhaust system inc custom tubular manifolds
38). Fit windscreen wipers and new blades
39). Rust proof box sections with Dinotrol
40). Replace a few vacuum hoses on servo and connect to inlet manifold
41). Complete bonnet lead loading and paint somehow and fit
42). MOT
part done-43). Get old registration back-part done
44). Cure slow airleak in 2 tyres
45). Run and test!
46). Fit trim to rear seats

Not much left to do then!


Monday 21 November 2011

No time to Loose

Now I am committed for the RBRR with the car there's no time to loose, I don't want to be finishing it in the Plough car park!

I have dug the cylinder heads and inlet manifold out.

I found some unusual rust in the core plug under the manifold - glad I spotted this - I'd have been blaming the water pump, or the inlet manifold gaskets in due course. The hole is shown by the self tapper in the following picture.


The heads have already had the valves and guides replaced, and the seats recut. However when these were inspected the castings were porous in some areas, so I had them welded. They pass pressure testing OK now, but as you can see some of the combustion chambers are a funny shape round the edge where weld has been let in. This needs shaping, and the sharp chamber edges smoothing off (to prevent detonation - pinking).

Its a lot of work and expense, but worth it as the heads are low mileage and haven't warped, and haven't been excessively skimmed.

I am going to cheat a little as these are being delivered to Roy Burrell tomorrow so he can work his magic upon them, I may get them ported a little at the same time too. This engine is going to need all its horse power to overcome 4wd losses


So that's one set of jobs underway, when they come back and I get them bolted on I will try and fire up the engine for the first time in many many years


Sunday 20 November 2011

Over a beer with Fatboyslim

Since the paintshop debacle the estate project's really been on hold. Although I have the money back, I cannot get motivated to get on with the car, and I am having trouble getting another paintshop which has time to take the car in. In a sense the lack of paintshop progress has been used as an excuse not to do anything with the car.

The amount of weekend work that I have had hasn't helped matters either.

If I hang on for another paintshop to be ready, many more months will have passed and no more work will have been done on the car.

So after a pint or two with Dave Pearson at the Manor House the other night, and after discussions about the RBRR and other Triumph related matters a cunning plan has been hatched.

I have made the decision to complete the car, but with the paint in its current state. At a later date I'll have a respray done of the exterior only. As the bonnet hasn't been painted at all, it may mean running it with a black bonnet like the Swiss car, but at least it will be on the road and running.

In a sense the car is quite near completion, but there are lots and lots of jobs that do need attending to.

So the way forward is going to be something like this:-

1). Get the heads finished - these had the porous areas welded up, and other work done, but I am left with mis-shaped combustion chambers - they need grinding and polishing, and chambers equalising .

2). Finish the engine when the heads are on, I already have the carbs done by Andrew Turner and ready for fitment

3). Then get the car off to an exhaust fabricator for a full system, manifolds and all, the exhaust people aren't too busy at present at the end of the motorsport season.

4). While this is ongoing complete the other small jobs to be done
a). one last brake line
b). test the electrics
c). fit the headlining (I may replace the botched tailgate hinges at this point too)
d). bleed the brakes
e). fire the engine up
f). complete the interior
g). fit the bumpers
h) fetch and fit my new windscreen - thanks to Ted

and finally drive the car !

you see there really isn't that much left to do!

It needs an MOT, an inspection by the Club to prove its authenticity and get the old registration back.

Completion IS going to be late spring, so it can have a few miles put on it before attending the Triumph 2000 register National, and its going to do the RBRR next year (assuming I get a place).

I have found a few more goodies for the car in recent months:-

A NOS drivers parcel shelf - this needs the crash rail fitting from my existing one, pity about all the repair work that I undertook on the original shelf


A pair of NOS original triumph front seat belts


So there we are, that's whats going to happen, ongoing support, and progress inspection visits from you lot are now required to keep me on track and the car going forward

Tuesday 9 August 2011

Money and the interior

Got the money from the bank today - must not spend it - must keep it safe for the new paint job!

As work has now slowed down after the summer rush I also got along to Aldridge Trimming today and collected the work they had done for me which is a new set of boot boards, and various backing pieces for the rear seat squab and upright.


All I have to do now is clean and add the aluminium and rubber runners, and all the chrome bits - job for the weekend I think.

Friday 8 July 2011

Chuffed to Bits

Well its all happening now, 2 posts in a week, but this one is about really really good news.

I have finally had a decision from my Bank's legal Dept.

They have agreed that the paint (and other work) is defective and that the Paint Shop should have rectified it without fuss or trouble, so they are paying me for:-

a). A full bare metal repaint
b). the costs of transporting it to and from another paintshop
c). the costs of trim removal and replacement
and
d). the cost of the chassis tilter and other items retained by the previous paint shop.

Its not going to be quick, even though the refund (which is more than the cost of the original job due to the extra work required and parts retained) will be here in a few days, but at least I can move ahead.

I have found a new body man, and he will take the car later this summer when he has space and time, although it will probably be with him for 4 months. He used to paint Bentley's and the like so I am sure my Triumph will get the paintwork it deserves.

Very Very happy tonight, after all the disappointment and upset.

There's a little further satisfaction too, in that the same legal dept will be seeking to reclaim the bank's money from the Paint Shop.

Maybe finished for Christmas, certainly for next spring, only a year later than planned, but the 4x4 2000 WILL be on the road again after all these years in  2012.

I think I am going to have a little celebration drink or two tonight!!

Tuesday 5 July 2011

Shiny Shiny

I know its a long time since I posted, but the poor paint saga continues, the paint continues to deteriorate, every panel has pin holes now, and on most you can now see the marks from the orbital sanders, revealing a load of close lines in the paint. There is a great deal of shrinkage of the paint.

If this isn't resolved by the NEC Classic Car show I am thinking of displaying the car, with ALL the paint defects on show so that everyone can see what a poor job was done. Anyway enough of the paint.

I went to the platers today - Marque Restore who are just down the road from me and collected the replated interior seat fittings, what a good job, the picture doesn't do it justice, because I am leaving the parts in the poly bags for protection, but they are just like new, all the screws bolts and other fittings are perfect too.


I have heard from Aldridge Trimming that all the seat backs and load area panels are complete now, so if I get a few hours I will collect them this week too.

Sunday 10 April 2011

Depressing News

Well its official now, I have had 2 new paintshops in to inspect the estate this weekend. Both have said the same, there's no way they will undertake the work unless they strip back all the exterior paint. They cannot be sure what has caused the problems, and there's no way they can give me a warranty on the new paint unless they bare metal the car. Thats got to be done by hand too with a DA and hand finished where a DA cannot get to, because they dont want to use chemicals because of the issue of removing the chemicals afterwards. They may look at soda blasting but its still not going to be quick.

So its a full strip of all the trim, glass, door mechanisms, lights etc etc. Then it goes to the new paintshop. What's worse is that they have both said that they will want the car for 3 - 4 months. Then when I get it back all the trim needs refitting. What a set back, hours and hours of additional unecessary work, plus it won't be finished for this summer now. At the moment I cannot even begin to face the task of the strip down - I suspect it will be a couple of weeks now before I commence that. I have got to remove the new and reconditioned parts carefully, and pack them away carefully hoping that I don't damage them in the process. Absolutely gutted!

The money thay want for the job is eyewatering too (some 80% or so of the original cost to do the entire car), I know I will recover this, but it another outlay, and an ongoing hassel.

Sunday 3 April 2011

Assessor's Paint Report

Here is the Assessor's report on the Paint, just names and costs removed to protect the innocent!

Our Ref: 8,41692 14 March 2011

Vehicle: Triumph 2500Type: 5 Door Estate
Reg No: YKV 201L
Chassis: MG57046SCBWP
Mileage: 00000Colour: Triumph White
Date of lnsp: 11 March 2011
Location: Sutton Coldfield

ENGINEERS REPORT -Post Repair lnspection

Dear Sir,

Thank you for your instructions in this case, we confirm completing our post repair inspection of the above mentioned vehicle at your home address - date as above. We understand that the purpose of this inspection is to provide a completely independent unbiased opinion of the quality and overall standard of paint work recently completed by XXXXXXXXX

History

We understand that this is a particularly rare vehicle and is currently part way through a full restoration. lt has been completely stripped of all mechanical and trim components; the body shell has been stripped back to bare metal by Surface Treatments of Dudley, following which an Electro Coating treatment has been applied. Both front wings and front panels have been replaced with new and the roof has been replaced with that from a donor vehicle.

At the time of inspection the vehicles condition can be described as a painted rolling shell, fitted with suspension, doors, tailgate, glass, fuel tank, door trims, dash and sound deadening pads. The bonnet remains to be restored and painted. As we have not had the opportunity of inspecting the vehicle prior to paint, we are unable to comment in detail on costs. We are advised that at figure of XXXX + vat was originally quoted for the work which has now increased by a further XXXX + vat.

Paint finish

First impressions of the work are generally good and paintwork is finished inside and out to a good standard. The colour match to what little of the original can be seen also appears good.


However on close inspection there are a number of issues to the detail which are of concern, in our opinion most appear to be the result of lack of attention to detail during the final stages of paint and final presentation

In considering the overall job and not wishing to be over critical of the repairs, we have also given consideration to the sum charged for this work. In conclusion we are of the opinion that the following issues noted are unacceptable given the costs involved.

We can confirm having noted the following issues which in our opinion require attention:


1). Front panel (top) - multiple dirt inclusions
2). O/S/F Wing - multiple dirt inclusions, repair flaw to the outer arch edge, paint cracked around 2 spot welds on wing flange.
3). N/S/F Wing-multiple dirt inclusions, plug welds on flitch side untidy and showing through due to insufficient preparation, paint transparent along front panel joint which appear to be as result of over polishing.
4). Windscreen Scuttle panel - multiple dirt inclusions, large paint sag to the n/s, sealer has been omitted from scuttle to inner wing joints on both sides.
5). Roof panel-multiple dirt inclusions, ripples evident across the entire width (between swage lines/centre areas) in several places, distorted/poorly replicated swage line to the o/s (above 'C' Post), small dent to the n/s/f area.
6). Tailgate-dirt inclusions and pin holes to the exterior paint surface, paint around the hinge bolts is damaged, alignment to the roof requires attention and the torsion rod hinge system will not either lift or hold the tailgate in the open position.
7). Rear Panel, paint run to o/s top corner, sealer omitted from the joints on both sides between lamp panels and rear panel.
8). O/S/R Quarter panel - sealer omitted from rear window aperture corner, small paint blisters to window frame suggesting moisture penetration, frame edges rough and poorly finished, profile of lower window frame edge not matching n/s frame.
9). N/S/R Quarter panel - sealer omitted from rear window aperture corner, small paint blisters to window frame suggesting moisture penetration, profile of lower window edge not matching o/s frame.
10). O/S/R lnner wheel arch (underside) -Paint work damaged.
11). Vertical surface of rear window surrounds are rippled and not finished flat.
12). Rear window frame flange joints have separated between spot welds, leaving large visible gaps requiring closing between spot welds.

Summary/recommendations

In general and as mentioned above the paint work is to a reasonably good standard, there are a number of areas with dirt inclusion which can be addressed, however there are more serious issues with the roof and tailgate hinge system.

For reassurance we can confirm that an element of dirt inclusion is common in vehicle refinishing, as also is an element of paint sinkage around repair areas. Both issues in most cases can be addressed and satisfactorily rectified by flatting and polishing once that the paint has fully cured. There are however more complex issues to be considered if attempts are to be made to rectify the repair sinkage lines and correction of the o/s roof swage line.

As we are unaware of the condition of the panels prior to paint, also of the amount of material applied, it is difficult to now provide the best advice as to the method of rectification. We can however confirm that to restore the correct roof swage line will certainly require rework and repainting. The same will also be required to both rear window frames. Localised paint work may be sufficient for the front wing flanges, rear panel joints and inner rear wheel arch.

With regard to the tailgate lift system, we understand that tension has been lost as a result of the one rod being cut and re welded. We suggest that this will most likely now require replacing as a unit in order to regain sufficient tension to lift the rear hatch.

This report is based upon the instructions received and on what was visible to us at the time of our inspection.

We confirm that we have attached a selection of annotated photographs which indicate some of the issues referred to above.

"l confirm that I have made clear which facts and matters referred to in this report are within my own knowledge and which are not. Those that are within my own knowledge I confirm to be true. The opinions I have expressed represent my true and complete professional opinions on the matters to which they refer."

Yours sincerely,

Friday 1 April 2011

Lack of Progress

Sadly I have reached a point where the estate project is going to slow down a lot, and there's nothing that I can do about it.

Since I have had the Vehicle Assessor's report on the paint work, and sent a copy to my paintshop for comment, nothing, nada, silence from them, for 2 long weeks. A second copy was sent to them earlier this week via recorded delivery, and I am now wondering if I will get any response at all.

So it looks as if I now need to locate another paintshop that is sympathetic to classics, suggestions please.

Its a real pain, as I cannot add anything else to the car, as it will then need removing when the paint work is fixed, and then replaced afterwards.

Also, if it goes to another paintshop, I know that they will want to bare metal the car to be able to offer any sort of warranty on their work, thats going to cause a lot of dust and dirt to be deposited over the existing items already fitted, suspension, engine, gearbox etc, so even more work and delay, even if they can take the vehicle immediately, and if they are any good the most likely situation will be a delay while they fit the car into their existing schedule of work.

The paintshop still have a few items off the car, that they never painted, I have asked for their return if they don't intend to fix the paintwork, but if they don't show, I have the added issue of having to source door check straps (I have asked arround and none of the usual suppliers appear to have stock), the plenum grill in front of the windscreen, and the door closing plates on the rear estate doors. Fortunately they never had the bonnet because I hadn't completed the lead loading at that time.

As to the money involved, I will have to pay the new paintshop in full, and then recover the cost from the first paintshop and or my credit card company - fortunately I paid by card to get protection under the Consumer Credit Act, if things did go wrong, and they certainly have.

This is supposed to be a hoby to enjoy, now its just hassel, I get enough of that at work.

On a brighter note I took the rear load area panels, and rear seat backs to Aldridge Trimming today, who are going to remake them and carpet them.  They have also agreed to make me a new headlining, so I can get a few jobs in progress. The chrome trim items from the seats have also been sent to a local plating firm.

I suspect this will be my last blog posting for a while, although I may put a copy of the vehicle assessors report up.

Sunday 20 March 2011

Power Steering Pump and PWDA

The first item to attend to was a quick coat of paint on the unfinished passenger parcel shelf, which is now ready to go back in the car

Power steering pump rebuild now, I removed the front pulley and then the 2 bolts from the rear case, and the flanged hose input leaving this

This cover is just retained by a large O ring at the front of the pump and will gently "tap off" from the front housing

Next to come out is the large circular internal clip, removal of this is helped by the hole where the small screwriver is inserted, which allows you to dislodge the clip, which when removed, and the "dish" underneath reveals this. The pump vanes are not spring loaded, but rely upon centrifugal force to force them out against the housing

The pump itself comes apart too,

and all this strips down into these component parts
After a good clean, the rebuild is a simple process of replacing the various O ring seals, lubricating it all with power steering fluid and reassembly, simples really I used a repair kit from LD Parts

Here's the rebuilt pump during painting, nice and shiney!


The PWDA valve (pressure warning differential actuator) looked like this at the start
and comes apart by unscrewing the nylon switch, then the large steel nut. The shuttle valve itself is always stuck, and the best removal method is to heavily tap the pwda valve onto something immoveable, and inertia will cause the shuttle to drop out
here are all the bits


the shuttle, top left just requires a clean and 2 new O rings, the brass body was cleaned by soaking it in vinegar overnight (coca cola works too), and I blacked the steel endpiece with that Frosts kit I used on the rivets
reassemble with some brake fluid, and here's the finished item

If Alan Chatterton requires more bling under his bonnet he can always get this chromed!, although watch out for the shuttle bore.

Thats 5 more hours today bringing the grand total hours worked to 803 hours

Where am I?